
Ansible is an open-source automation tool used for configuration management,
application deployment, and orchestration. Ansible uses SSH for communication with target systems, making it agentless and easy to set up. Ansible does not require any agents or additional software to be installed on the managed hosts so we can say Ansible is agentless. Ansible is based on a “push” based mechanism for configuration management and automation
It is a powerful automation tool that operates based on a client-server architecture. It uses a simple YAML-based language to define automation tasks called playbooks.
Contents
Installation of Ansible
sudo add-apt-repository ppa:ansible/ansible
sudo apt update
sudo apt install ansible
ansible --version
Setting Up the Inventory File
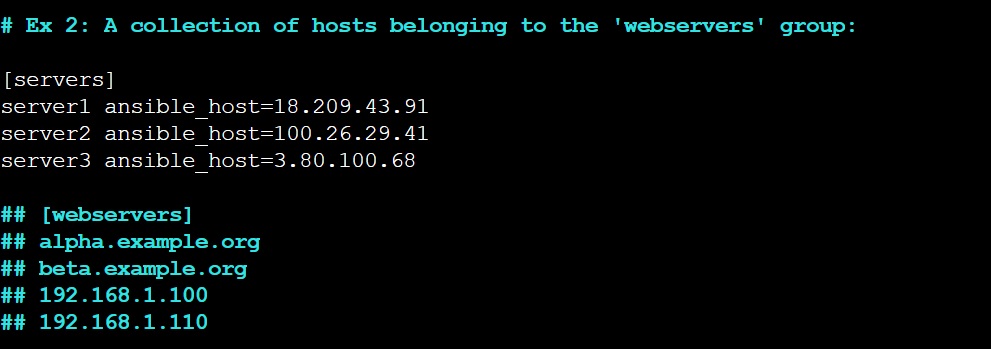
The inventory file contains information about the hosts you’ll manage with Ansible. You can include anywhere from one to several hundred servers in your inventory file, and hosts can be organized into groups and subgroups.
sudo vim /etc/ansible/hosts[servers]
server1 ansible_host=18.209.43.91
server2 ansible_host=100.26.29.41
server3 ansible_host=3.80.100.68Note: Be sure to replace the highlighted IPs with the IP addresses of your Ansible hosts.
To check your inventory, you can run:
ansible-inventory --list -yNow make one directory
mkdir keys
cd keys
Now we will add our private key to this folder and by using this private keys we connect to other servers
We have the private key which we have downloaded earlier during our launch of EC2 instance and now we have to send that private key from our local system to our master server. Open the terminal in your local system folder where you key was downloaded
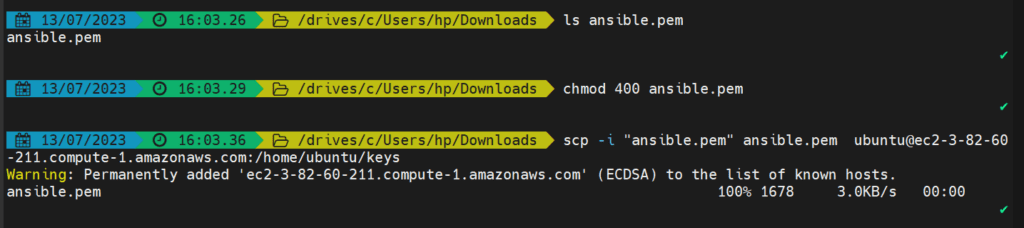
Now our private key is copied to the server at /home/ubuntu/keys
Now this is the location of our keys i.e. /home/ubuntu/keys and we have to tell this location to our ansible variable
Again go into your inventory file
sudo vim /etc/ansible/hosts[servers]
server1 ansible_host=18.209.43.91
server2 ansible_host=100.26.29.41
server3 ansible_host=3.80.100.68
[servers:vars]
ansible_python_interpreter=/usr/bin/python3
ansible_user=ubuntu
ansible_ssh_private_key_file=/home/ubuntu/keys/ansible.pemThis parameter makes sure the remote server uses the /usr/bin/python3 Python 3 executable instead of /usr/bin/python (Python 2.7), which is not present on recent Ubuntu versions.

To check your inventory, you can run:
ansible-inventory --list -y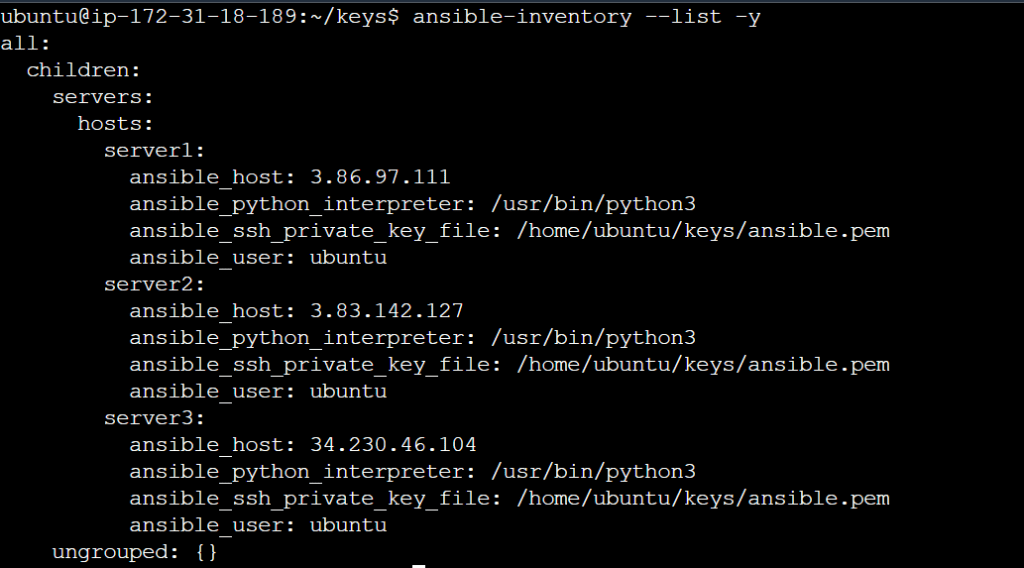
Now that we’ve configured our inventory file, and now we will test the connection to our Ansible hosts
ansible servers -m ping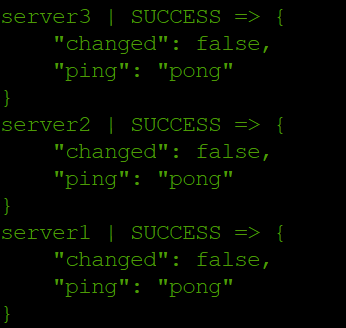
Note: If you’re connecting to your servers first time via SSH, you’ll be asked to confirm the authenticity of the hosts you’re connecting to via Ansible. When prompted, type yes and then hit ENTER to confirm.
The ping module will test:
- if hosts are accessible
- if you have valid SSH credentials
- if hosts are able to run Ansible modules using Python
Running Ad-Hoc Commands
Any command that you would normally execute on a remote server over SSH can be run with Ansible on the servers specified in your inventory file. Ad-Hoc Commands run individually to perform quick functions. The ansible Ad-Hoc Commands uses the /usr/bin/ansible CLI tool to automate a single task
ansible servers -a "free -h" # a = argument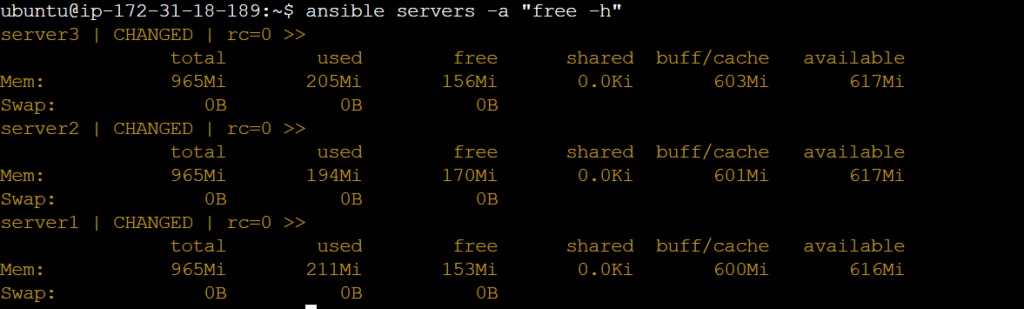
ansible servers -a "sudo apt update" # ansible servers -ba "apt update"Ansible Playbooks
Ansible playbooks are written in YAML and consist of a series of tasks. Each task defines an action to be executed on a target host. Each playbooks is composed of one or more modules in a list.
mkdir playbooks
cd playbooks
vim date.yml
---
name: Date playbook
hosts: servers
tasks:
- name: show me date
command: dateTo check whether an Ansible playbook is formatted correctly or not:
ansible-playbook date.yml --checkTo execute an Ansible playbook:
ansible-playbook -v date.yml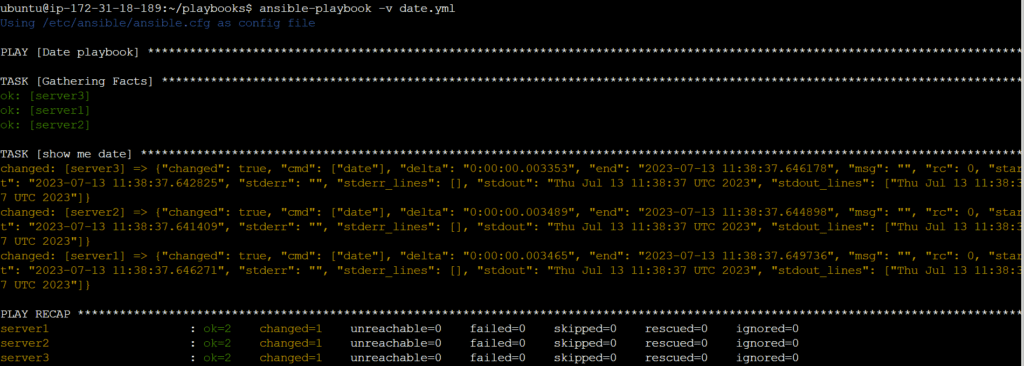
Example 2:
cd playbooks
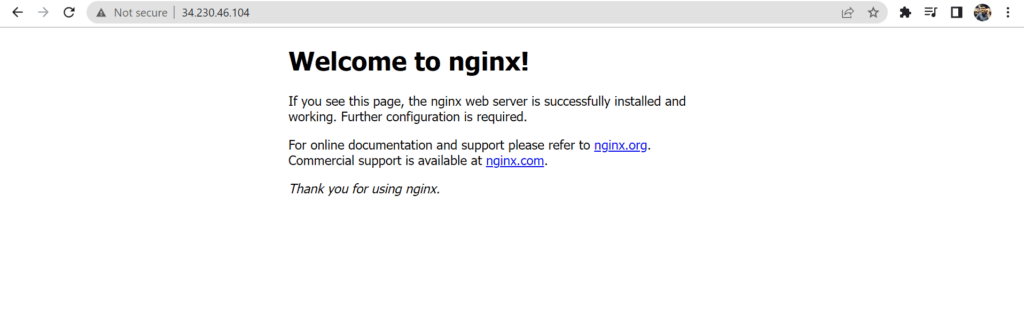
vim install_nginx.yml---
name: This playbook will install nginx
hosts: servers
become: yes
tasks:
- name: install nginx
apt:
name: nginx
state: latest
- name: start nginx
service:
name: nginx
state: started
enabled: yesansible-playbook install_nginx.yml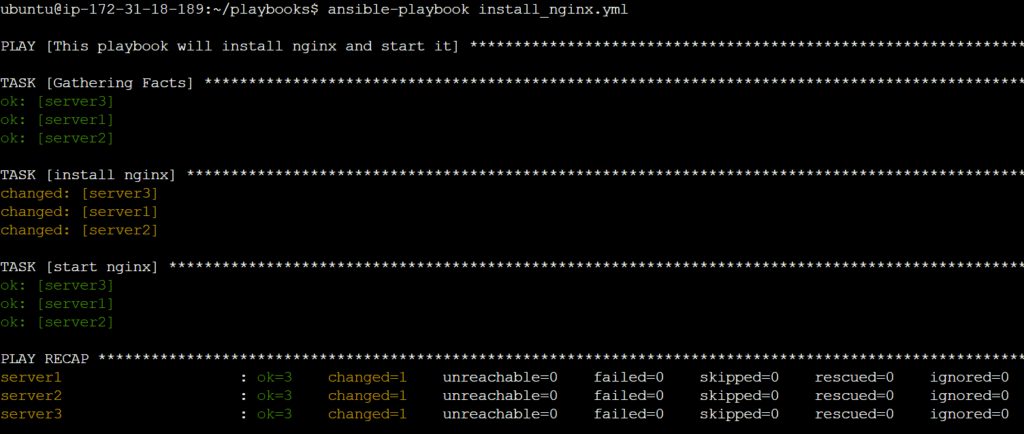
Example 3:
---
- name: Install package
  hosts: servers
  become: yes

  vars:
    package_name: "apache2"    # Variable

  tasks:
    - name: Update package cache
      apt:
        update_cache: yes

    - name: Install package
      package:
        name: "{{ package_name }}"
        state: present

Handlers in playbooks
Handler is a special type of task that gets triggered only when notified by other tasks. Handlers are commonly used to restart services or perform specific actions after certain tasks have made changes on the target system. Handlers are defined separately from tasks and are typically placed at the end of a playbook or in a separate “handlers” section.
Example:
---
- name: Example Playbook with Handlers
hosts: all
become: yes
tasks:
- name: Install package XYZ
apt:
name: xyz
state: present
notify:
- Restart XYZ Service
handlers:
- name: Restart XYZ Service
service:
name: xyz
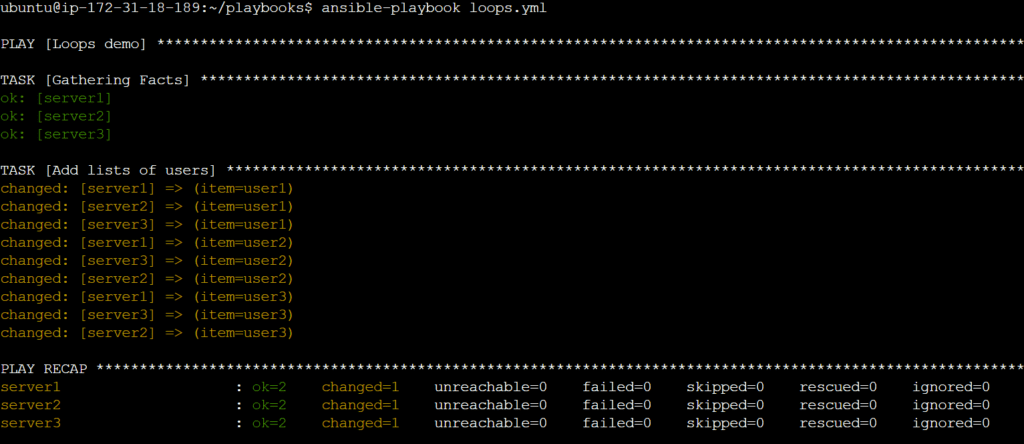
state: restartedLoops in playbooks
Loops allow you to repeat a task or a set of tasks multiple times, iterating over a list or dictionary of items.
---
- name: Loops demo
  hosts: all
  become: yes

  tasks:
    - name: Add lists of users
      user:
        name: '{{ item }}'
        state: present
      loop:
        - user1
        - user2
        - user3

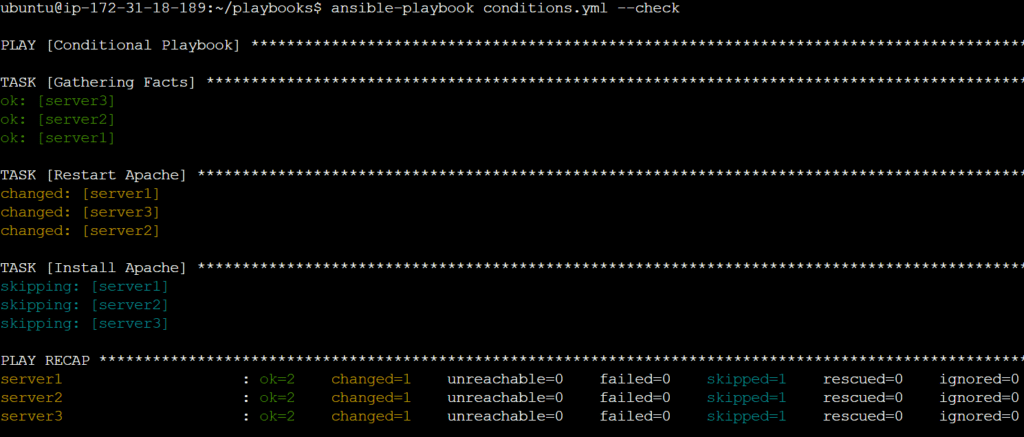
Conditions in playbooks
Conditions are used to control the execution of tasks based on certain conditions or variables. Conditions allow you to create flexible and dynamic playbooks that adapt to different scenarios.
Example 1:
---
- name: Conditional Playbook
  hosts: servers
  become: true

  tasks:
    - name: Install Apache
      apt:
        name: apache2
        state: latest
      when: ansible_os_family == 'Debian'

    - name: Install Apache
      command: yum install -y httpd
      when: ansible_os_family == 'RedHat'
# command module is used to run normal linux commands
Example 2:
---
- name: Conditional Playbook
  hosts: servers
  become: true

  tasks:
    - name: Install package XYZ
      apt:
        name: xyz
        state: present
      register: result

    - name: Handle package installation failure
      debug:
        msg: "Package installation failed!"
      when: result.failed

    - name: Handle package installation success
      debug:
        msg: "Package installation succeeded!"
      when: result.changed
Vault in playbooks
Vault is a feature that allows you to encrypt sensitive data, such as passwords, API keys, or other secrets, within playbooks. This helps ensure the security and confidentiality of sensitive information.
To create a vault file
ansible-vault create vault.yml
To edit encrypted playbooks
ansible-vault edit vault.ymlTo change the password:
ansible-vault rekey vault.ymlTo encrypt an existing playbooks
ansible-vault encrypt demo.yml
To decrypt an existing playbooks
ansible-vault decrypt demo.ymlRoles in playbooks
Roles are a way to organize and structure your playbook code by grouping related tasks, handlers, variables, and files into reusable units. Roles provide a modular and reusable approach to managing and configuring systems.
There are several predefined directories that have specific purposes. These directories help organize and structure the role’s files and assets.
tasks/: This directory contains the main tasks file (main.yml) where you define the tasks to be performed by the role. Tasks can include package installations, file manipulations, service management, or any other actions related to the role’s purpose.handlers/: Handlers are tasks that are only triggered when notified by other tasks. Thehandlers/directory stores the handler tasks. Handlers are typically used to restart services or perform specific actions in response to changes made by tasks.templates/: If your role requires template files, you can place them in thetemplates/directory. Templates are text files that can be customized with variables and used to generate configuration files or other output files.vars/: Thevars/directory is used to define role-specific variables. Variable files placed in this directory can be accessed and used within the role’s tasks and templates. The variables can be used to parameterize the role’s behavior and make it more flexible.defaults/: Thedefaults/directory contains default variable values for the role. These variables are automatically loaded if not defined elsewhere. They provide default values that can be overridden by user-defined variables or inventory variables.files/: If your role requires static files, such as configuration files or scripts, you can place them in thefiles/directory. These files can be copied to the target system as part of the role’s tasks.meta/: Themeta/directory contains metadata information for the role. This includes themain.ymlfile where you can define dependencies, specify supported platforms, and provide other metadata about the role.
The basic directory structure of an Ansible role is as follows:
roles/
├── defaults/
│   └── main.yml
├── handlers/
│   └── main.yml
├── tasks/
│   └── main.yml
├── templates
└── vars/
    └── main.yml
Note:
ansible all -m setup“ansible all -m setup,” is used to gather system facts from all hosts in an Ansible inventory. It uses the “setup” module to collect information about the target systems, such as hardware details, operating system information, network configuration, and more.
We know that in modules and playbooks, idempotency is present means executing a module or playbook multiple times will not cause any unintended changes and it produces the same result, regardless of the initial state or the number of executions and in the backend ansible uses the same above command for checking the idempotency.
Conclusion
Ansible is a powerful automation tool that simplifies IT infrastructure management. It offers a wide range of features and benefits, including simplicity, efficiency, and idempotency. By following the installation instructions and best practices, you can harness the full potential of Ansible for your infrastructure automation needs.