


Jenkins is an open-source automation server that is used to automate the building, testing, and deployment of software projects
Jenkins is a popular tool for continuous integration and continuous delivery (CI/CD) pipelines. It can be used to automate the entire software delivery process, from building and testing code to deploying it to production.
CI/CD (Continuous Integration/Continuous Deployment) pipeline is a set of practices, tools, and processes designed to automate the building, testing, and deployment of software applications.
In a typical CI/CD pipeline, code changes are continuously integrated into a central repository and automatically built, tested, and deployed to production environments. This allows developers to catch and fix bugs early in the development cycle, deliver new features more quickly, and improve the overall quality and reliability of their software applications.
To deploy a Node.js application on an EC2 instance and create a CI/CD pipeline using Jenkins, you can follow these steps:
Step 1: Launch an EC2 instance and ssh into it
Log in to the AWS Management Console, navigate to the EC2 dashboard, and launch a new EC2 instance. Choose an Ubuntu Amazon Machine Image (AMI) to start.


Blog on how to launch an EC2 instance on AWS : Click here
Make sure that the security group associated with your EC2 instance allows incoming traffic on port 8080, which is the default port for Jenkins. You can do this by creating a new inbound rule in the security group.


Connect to the EC2 instance using SSH. You can find the connection details on the EC2 dashboard.
You can install MobaXterm to SSH into your EC2 instance: Click here
Step 2: Install Jenkins on the server
Blog on how to install Jenkins on AWS EC2 : Click here
Step 3:
Once Jenkins is up and running, you can access it by navigating to your EC2 instance’s public IP address followed by port 8080

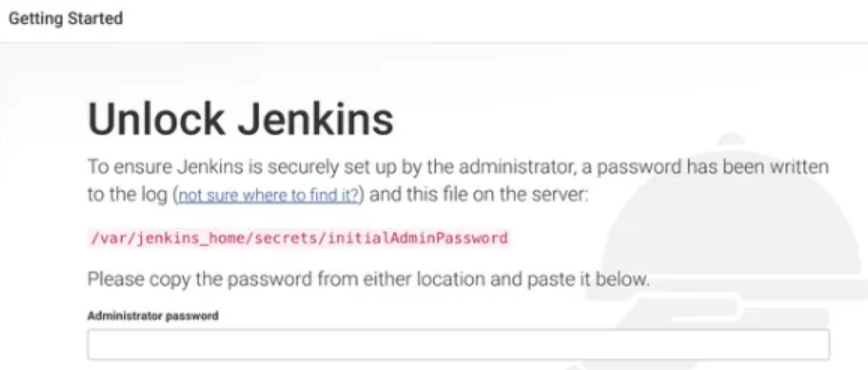
To get the password, type the following command
sudo cat /var/lib/jenkins/secrets/initialAdminPasswordStep 4:
Create a new repository on GitHub to store your Node.js application code.
For demo Node.js application: Click here
Step 5:
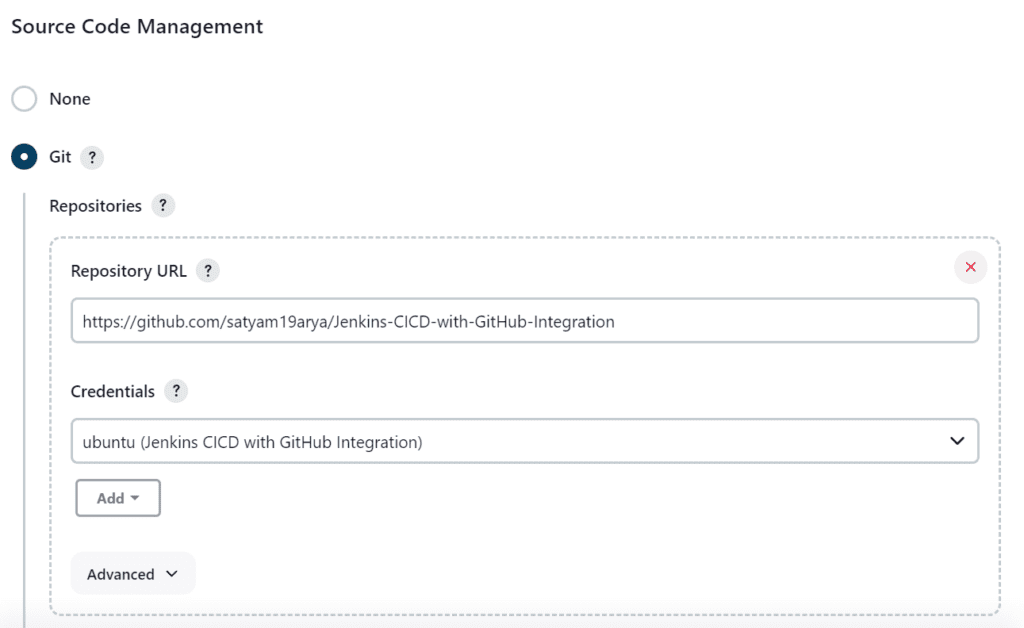
Configure the job to pull the code from your GitHub repository, build the application, and run any tests.


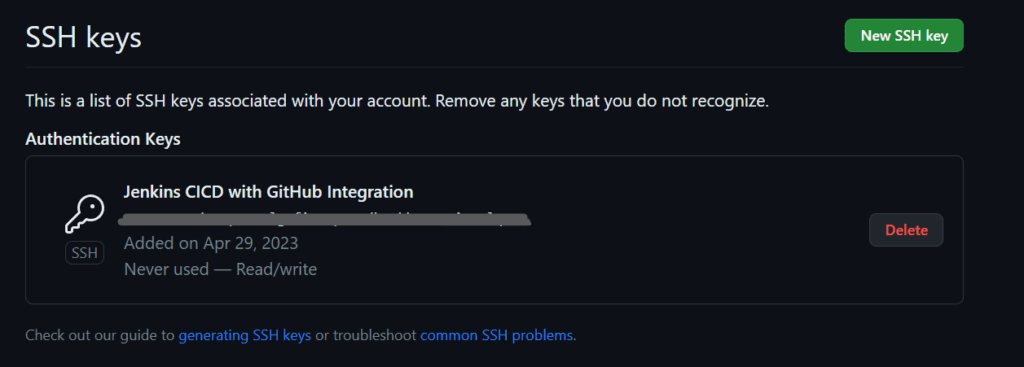
Now, run ssh-keygen in your instance so that it will generate public private key to create connection between GitHub and Jenkins.
ssh-keygen
cd .ssh
ls
cat id_rsa
cat id_rsa.pub
id_rsa is our private key and id_rsa.pub is our public key
Now, we have to give our public key to GitHub and private key to Jenkins.

Step 6:
Login into GitHub -> Open setting -> Under Access Section, click on SSH and GPG keys to add SSH Key

Now we will add the credentials to Jenkins so that Jenkins can access the code from the GitHub.

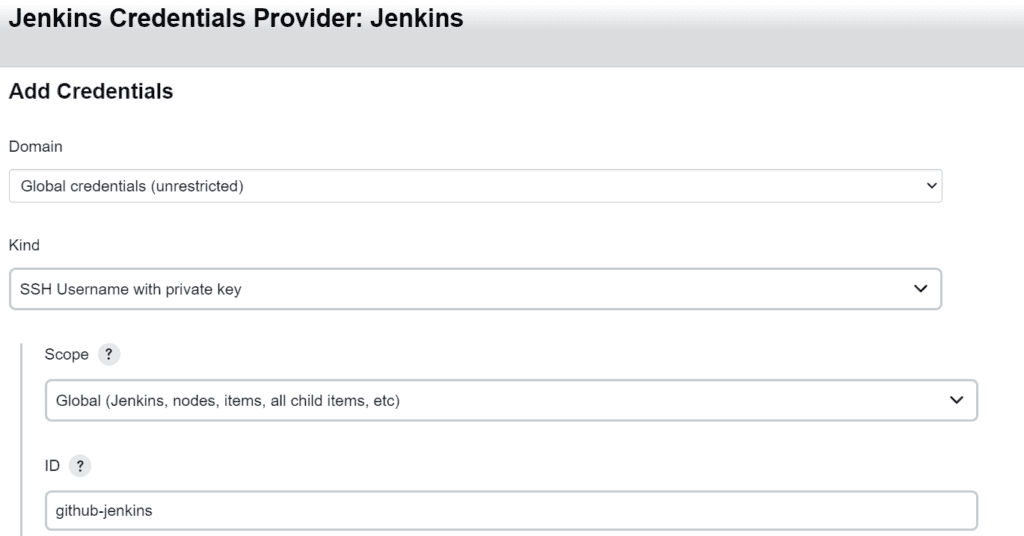

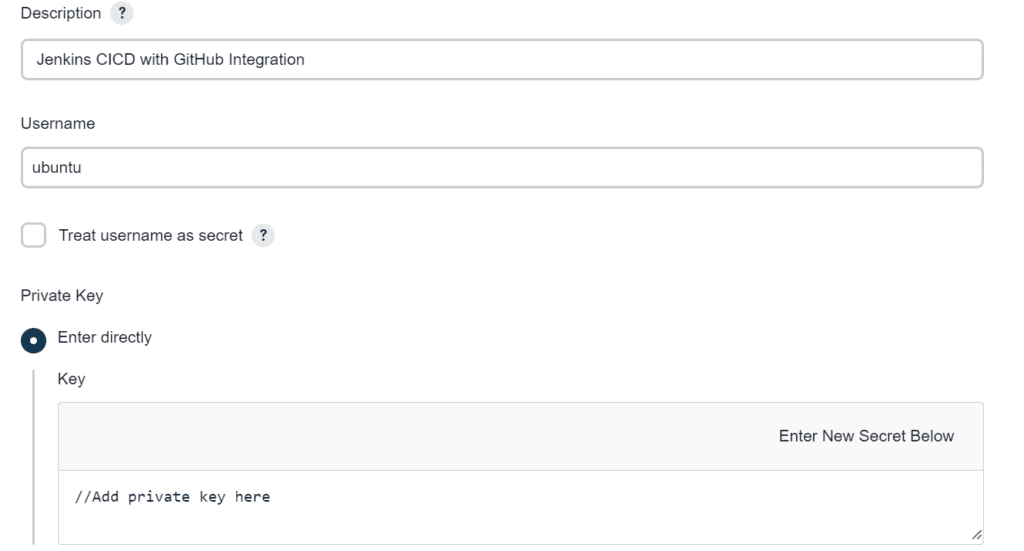
Click on Add -> save it
Under Credentials, select the credential that you recently created

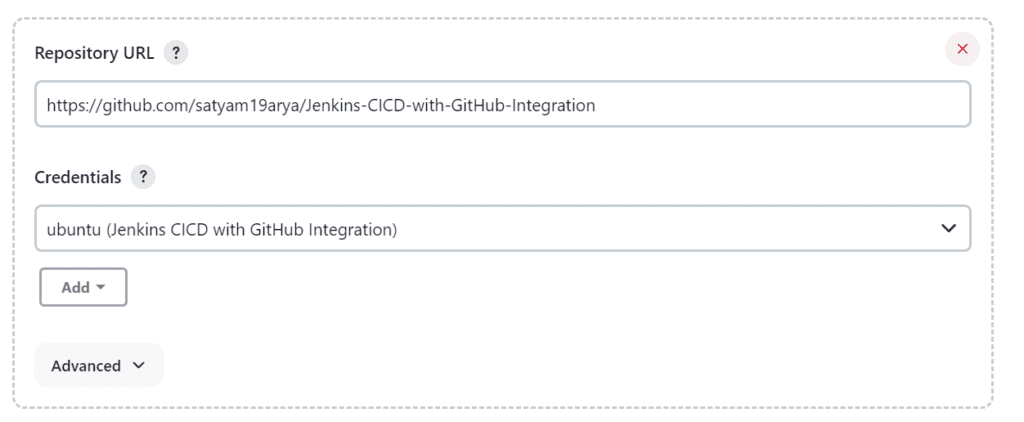
Now we are all ready to Build the job now. Click on Build now.

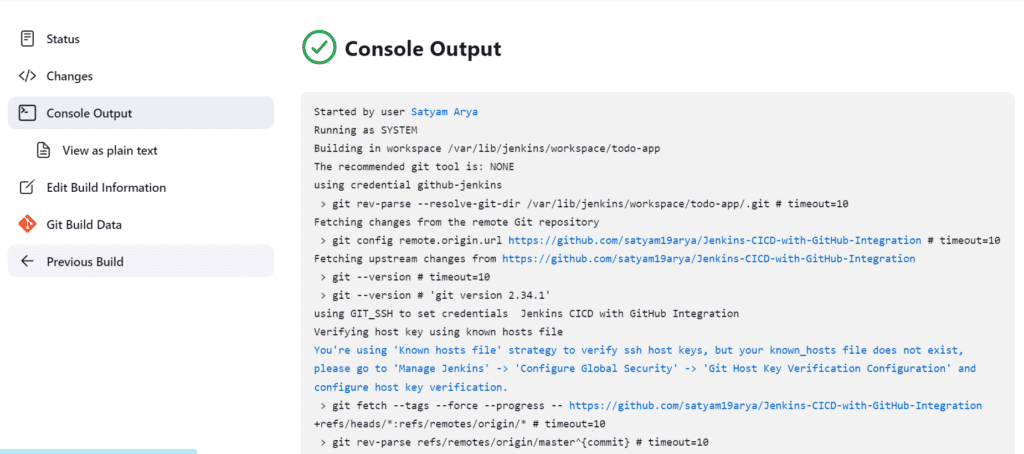
Step 7:
Go to instance and check if the repo is cloned there
cd /var/lib/jenkins/workspace/todo-app
ls
Now check the readme and install the necessary dependencies.

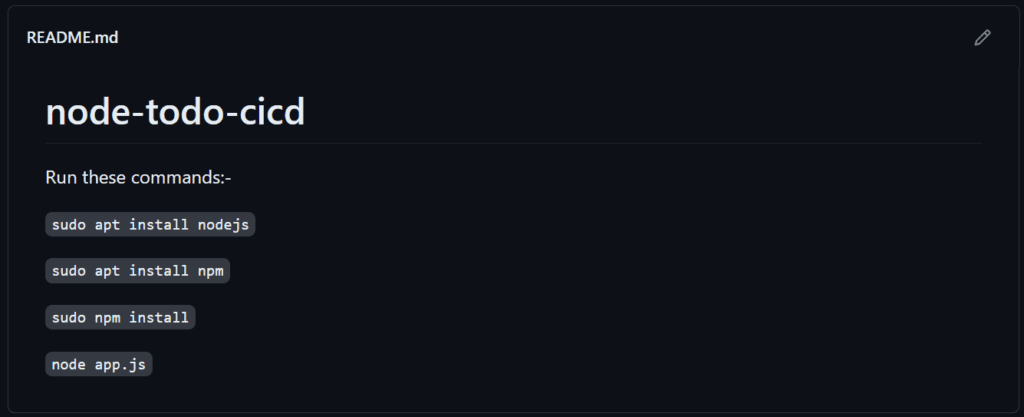
sudo apt install nodejs
sudo apt install npm
sudo npm install
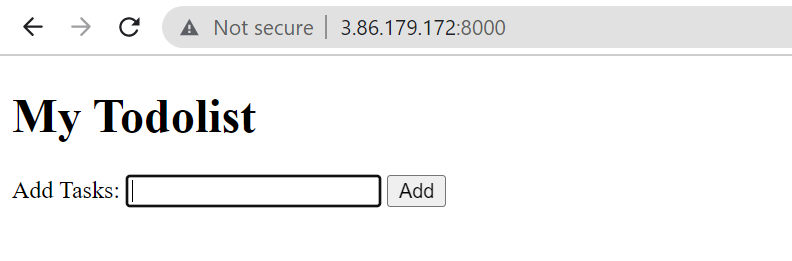
node app.jsNow our application is accessible on port 8000
Make sure that the security group associated with your EC2 instance allows incoming traffic on port 8000

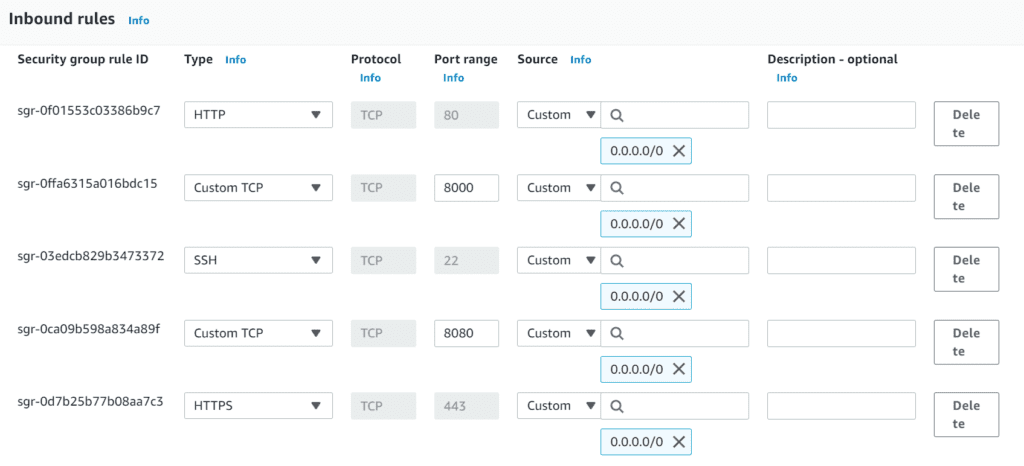
Now take public IP of the instance and port 8000 and you can access the application.

Step 8:
Now we will dockerize the application so that it can be accessed anywhere by anyone.
Install the docker
sudo apt install docker.ioDockerfile
FROM node:12.2.0-alpine
WORKDIR app
COPY . .
RUN npm install
EXPOSE 8000
CMD ["node","app.js"]
Now build the image using this Dockerfile
First we will give the permission and restart the server
sudo usermod -a -G docker $USER
sudo reboot
Restart the terminal again and go back to your working directory
cd /var/lib/jenkins/workspace/todo-appdocker build . -t node-appNow we will create container from this image.
docker run -d --name node-app -p 8000:8000 node-appNow take public IP of the instance and port 8000 and you can access the application.

Step 9:
Now we will automate this process by adding the commands in the shell

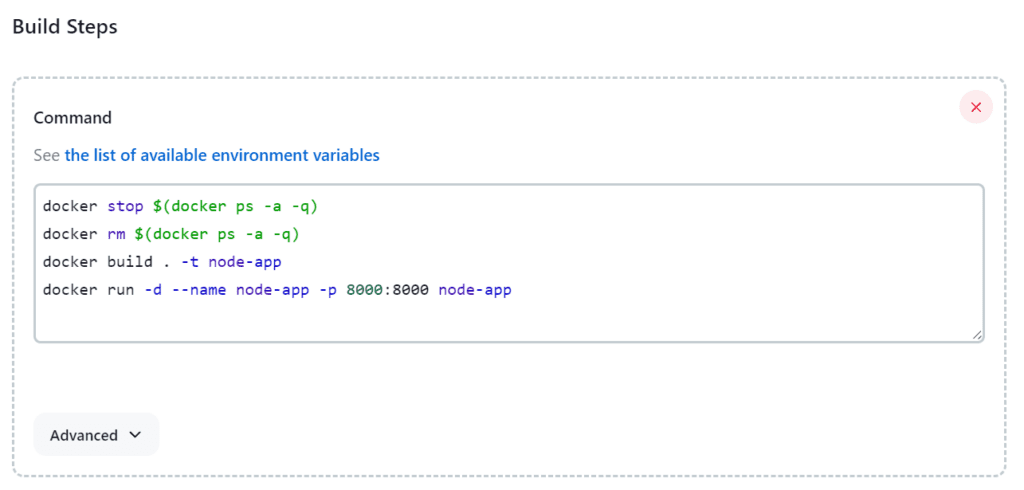
Now all the processes that we were doing manually will be performed automatically as we did the automation.
If got permission denied error, run the below command to give permissions
sudo usermod -a -G docker jenkins
sudo systemctl restart jenkins
Step 10:
Now we will configure web-hook so that every time there is any updation, deletion on the repository the job should be automatically triggered and it should perform the upcoming processes.
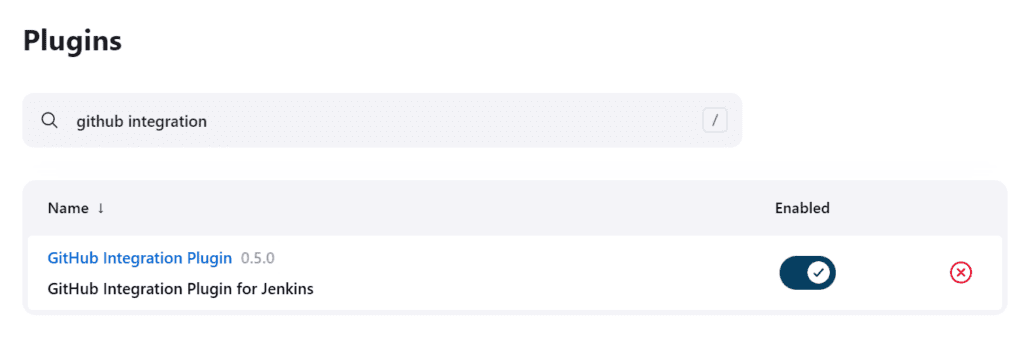
Go to Jenkins -> Manage Jenkins -> Manage Plugins -> Install Github integration plugin

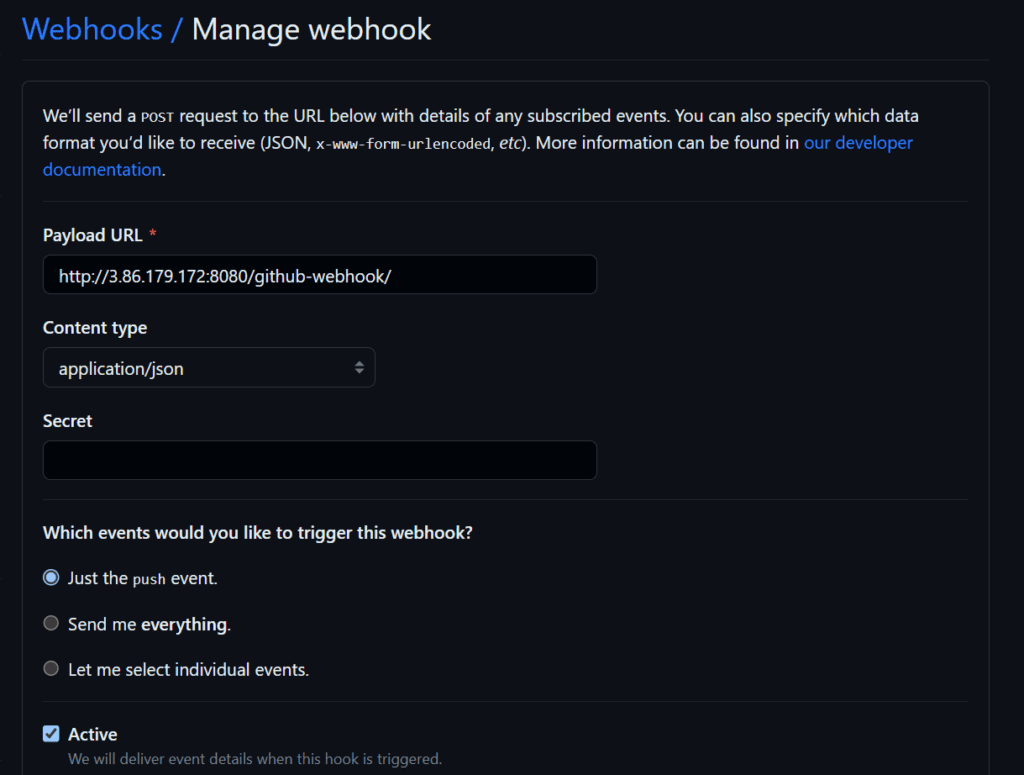
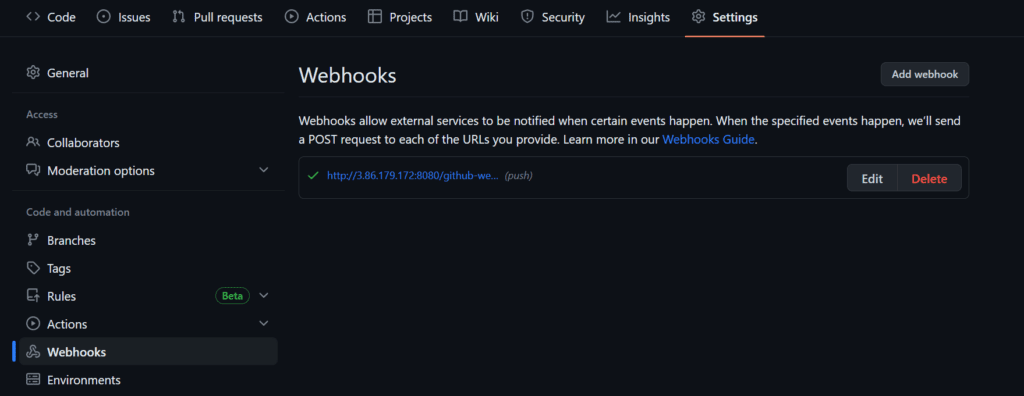
Go to repository settings -> webhooks -> Add webhook
Payload URL -> http://3.86.179.172:8080/github-webhook/
Content type -> application.json


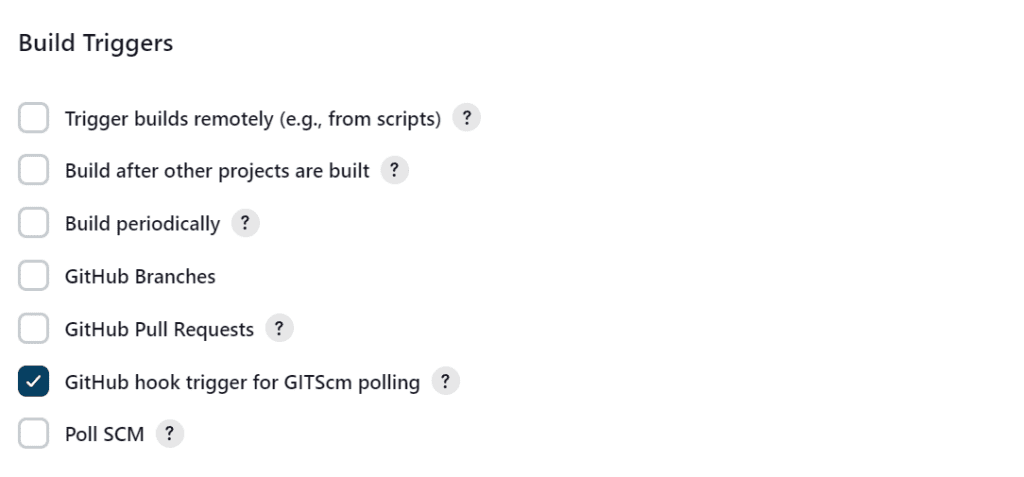
Go to Jenkins -> configure -> tick this

Now just update something in the repo and your job will be triggered automatically
Note: If you are getting got permission denied, run the following command and then update something in the repo and your job will be triggered automatically
sudo usermod -a -G docker jenkins
sudo systemctl restart jenkins
If you have any questions or feedback, feel free to leave a comment below. Thanks for reading and have an amazing day ahead!😊